There's an awful lot of information regarding storyboarding that needs to be understood if you want to become a storyboard artist on any type of production, whether it's just for yourself, a school project, a freelance job, a short film, a television show, commercial, music video, or a feature film.
My intention here is not to try to put everything onto one page. I'm going to spread it out a bit and try to cover as much as I can.
This may also sound like a "cop-out statement", but the best way to learn how to storyboard is to actually do a storyboard... lots of them. This is not to say that I'm not going to show you examples... I will. Along the way, I'll show you a few techniques that will help you get motivated to actually get some done.
I had a course when I went to college called "Visual Language". It wasn't about storyboarding but rather how we interpret visual input through our eyes in everything we look at. This visual input is a language all it's own. Like any other way of learning a language we need to start with the basic building blocks.
Storyboards present the visual image of what the viewer will be looking at on screen, whether it's a television set, a movie theater screen or a computer monitor. These are shown in a format called a "storyboard panel". A storyboard panel is a rectangular shaped box on a piece of paper. The dimensions of this box are usually around 4" wide x 3" high for television. There are usually 3 panels to an 8 1/2" x 11" page. The size and shape of the panel can vary depending on what is called the "aspect ratio". This is the size of the width to the height. The television aspect ratio is 1:1.33 - 1 units high by 1.33 units wide (also known as 3:4). Standard Widescreen is 1:1.85, 70mm film is 1:2.2, and Anamorphic Wide screen in 35mm Panavision is 1:2.35.

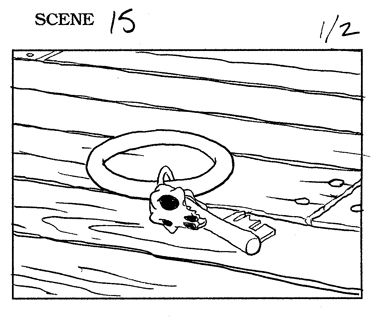
A storyboard artist usually works with a set of pre-printed storyboard pages such as the ones shown here
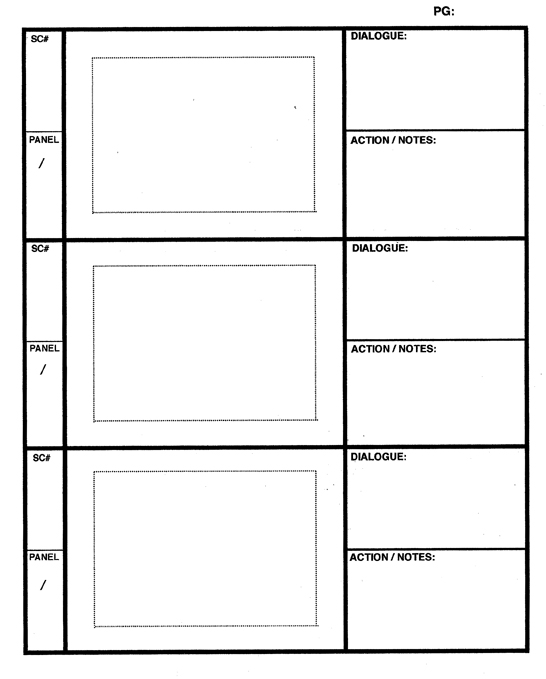
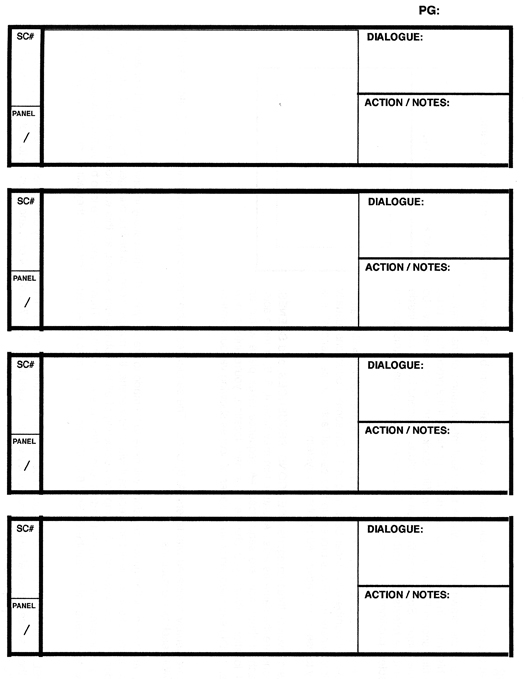
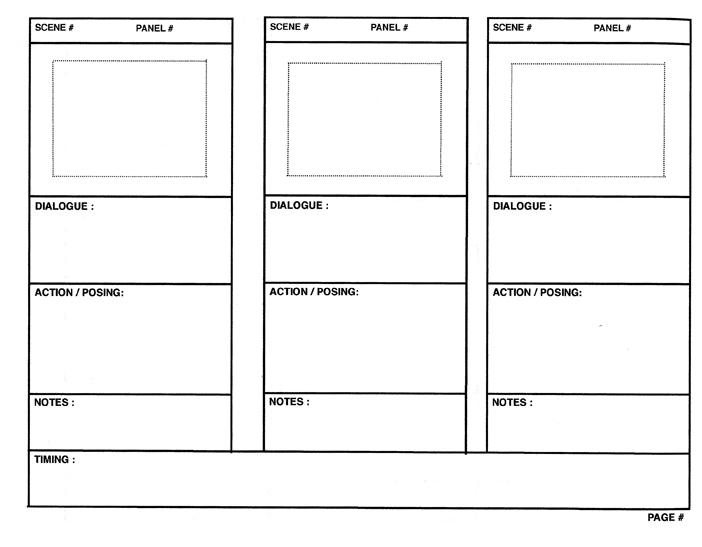
The storyboard artist draws the image in the box and then fills in the appropriate information in the other boxes on the page.
Each image area represents what will eventually be shown on the screen. Therefore the storyboard artist needs to keep the information clear and understandable to the viewer at all times.
Shots/Scenes
The storyboard artist illustrates the point of view that the audience will be looking at throughout the entire movie. They do this through a series of "shots" or "scenes".
Think of a shot this way: through your eyes you are looking at something. At this very moment it's these words on this internet page on your computer. If you pause for just a moment as you keep reading this, notice what is within your "field of vision". That's all the stuff you can see right now through your eyes, without moving your head around. Now turn your head and look behind you. What do you see now?
As you turned your head, I'll bet you closed your eyes for a moment, maybe just a blink as you physically moved your head. When you opened your eyes again, you were looking at a different area than you were when you were looking at the comuter screen. In storyboarding and filmmaking in general, this would be considered a new "shot" or "scene". The moment that you closed your eyes would be called a "cut". In real life, when we close our eyes to blink we see black. In film, they take out the black and have one scene instantaneously move to the next one.
I'm sure you've seen "the making of..." on a DVD where they show the director at the beginning of the scene call out "...and ACTION!", then when the scene is done, the director will call out "...and CUT!" The statement "action" means 'begin', and "cut" means 'end'. Later when the film is processed, the editor will cut out the unnecessary film at the beginning where the director says, "action" and then cut the end off where the director says, "cut". They will then splice this scene to the end of the previous scene and then splice on the next scene. The moment when one scene ends and the next one begins is called a cut.
Any time you are looking at something from a new point of view, you have a new scene. It's up to the storyboard artist to choose the shots that will be used from the beginning to the end of the film. The type of shot used will dictate where you, the viewer are within the movie, and how you perceive what is going on.
Good shot selection can make a movie very interesting or it can make it very boring. It all depends on what you want the viewer to see and feel. Let's go through some of the basic shot selections that you have available to you.
Types of Shots
Here's a listing of some of the different types of shots that you have available in your "storyboarding tool kit":
Camera Angles
A "camera angle" usually refers to the placement of the camera relative to the subject that it is photographing. If you think of yourself as physically holding the camera, ask yourself where you are... are you near the subject or far away from them? Are you standing at their height or are you up high looking down on them? Or are you below them looking up?
Extreme long shot
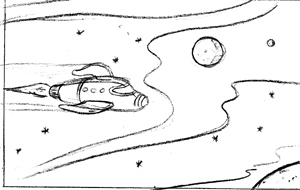
The camera is positioned a good distance away from the subject. This shot is used more for the purpose of showing the environment that the character is in and their relationship to it. Usually used as an "establishing shot" as well to introduce the audience to a new location and the character's relationship or placement within it.
Long shot
This is closer to the character and shows the entire character with some space both above their head and below their feet. Sometimes called a "full body shot" as well.
Medium shot
This shot cuts the character off between their knees and waist. Sometimes also called a "waist shot", it doesn't actually have to show the character from the waist up, it could show the character from the waist down if necessary, but is not limited to just showing half of a character. It simply means that you are closer to the subject than you would be in the long shot.
I should also mention here that there are shots half way between each of these as well. Between the medium shot and long shot is a "medium long shot" which would cut the characters off around their knees as in the two examples below.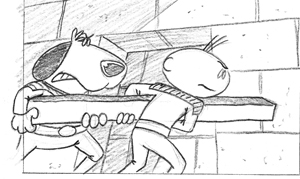
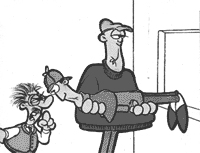
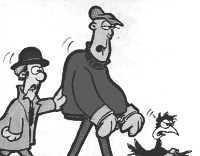
This second example is sort of a weird combination of a "long shot", "medium shot" and a "medium long shot" in that Sherluck Homes is shown full body which is the definition of a long shot, while the character holding him is shown from the knees up which is a medium long shot and the character on the left, Professor Morethanartie, is shown from the waist up, which is a medium shot. You could just pick one and call it a medium long shot.
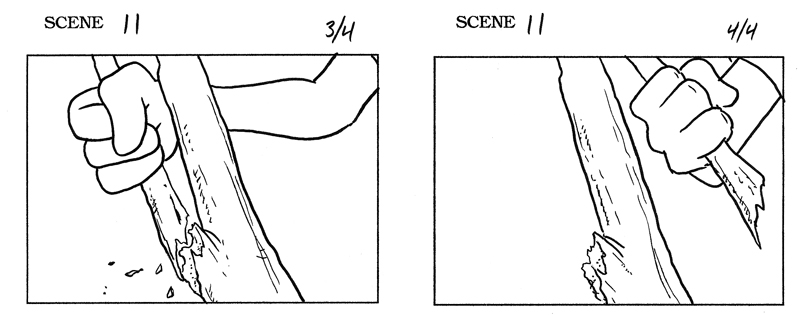
Close up
There's the famous line, "I'm ready for my close up Mr. Demille". This shot is usually of a character from their shoulders up. Again it's not limited to just the head as in the example below, showing the character's hand.
This would be called a "close-up head shot":
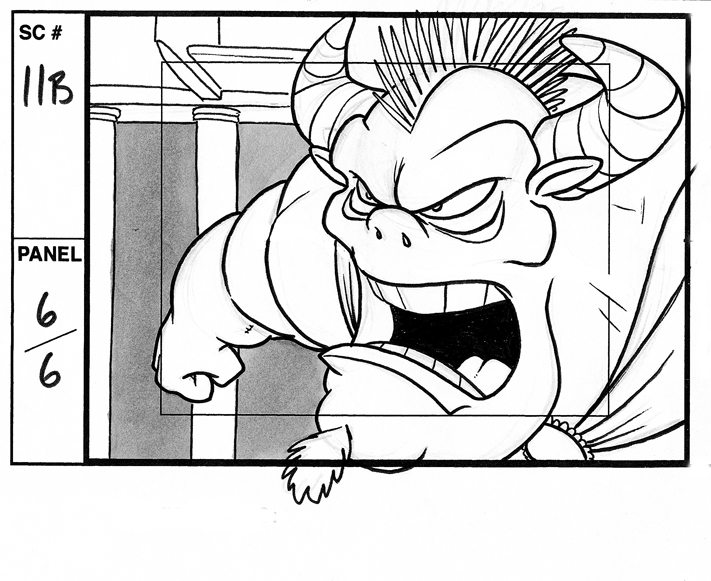
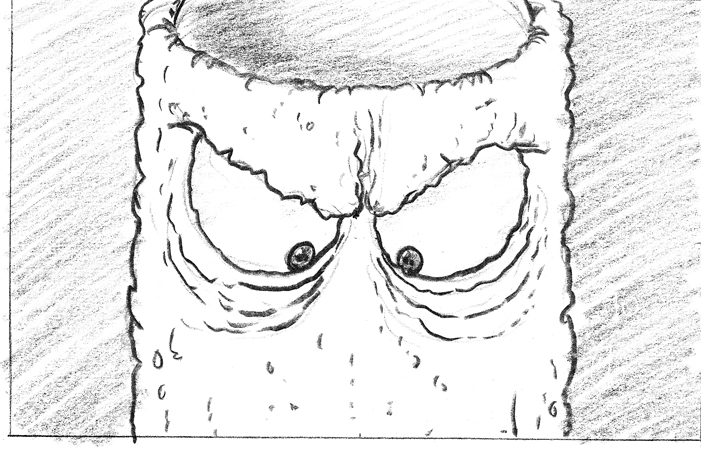
Extreme close up
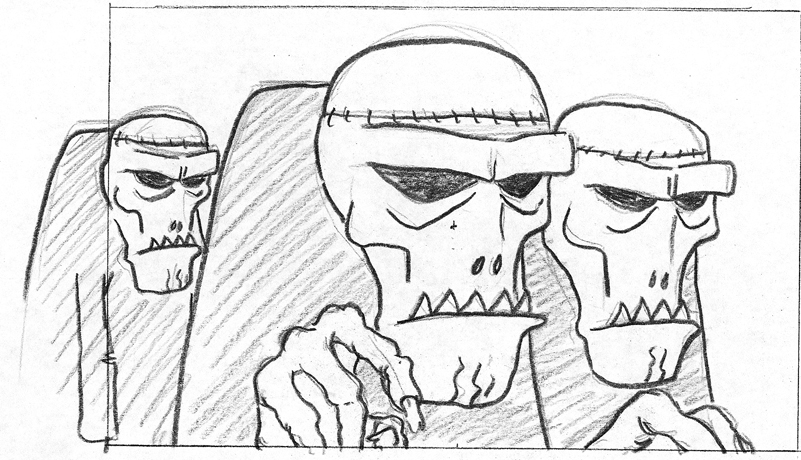
The extreme close up moves in on the subject even tighter, usually highlighting something specific, like in this case, the character's eyes.
Up shot
This is where you tilt the camera so that it is looking up. It can also be used in combination with any of the above shots.
This would be a "Medium up-shot".
Down shot
The exact opposite of the Up shot. The camera is tilted down towards the subject.
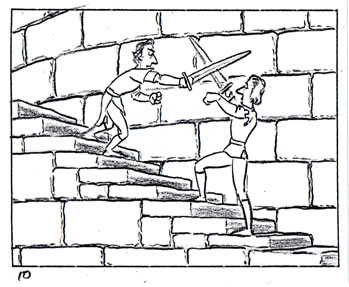
Low angle
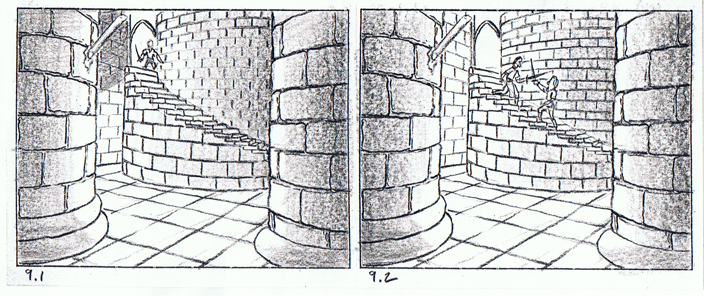
A low angle shot means that the camera is still pointed towards the horizon line but is positioned lower in relation to the subject. It's like an up shot but the camera is not tilted up.
In the example shown here, the horizon line is just below the feet of the character on the right and so the camera is directed at the horizon line but from our point of view, we appear to be looking up at the stairs towards screen left.
Again, this can be combined with the other shots above.
High angle
The opposite of the Low angle shot.
Tilt (Dutch)
In this type of shot, the camera is tilted to one side or the other and held on that angle. It creates a slightly unsettling feeling that things aren't quite right. It makes you feel off balance as though you're going to fall over. This shot was used extensively in the 1960's television series, "Batman" any time we were in the villian's lair.
Pan Shots
A Pan shot is when the camera physically moves within an environment to either show that a character or subject is moving, or the audience's point of view is changing without the cut.
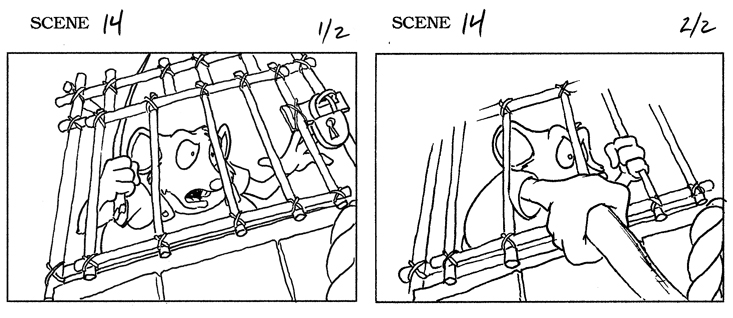
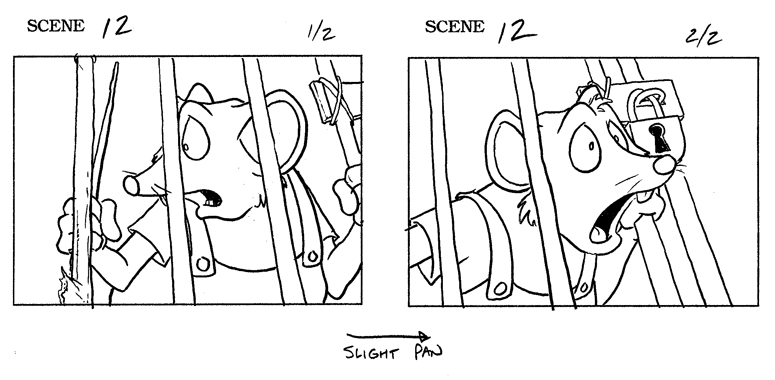
Horizontal Pan
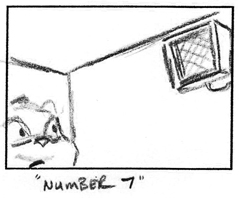
The camera moves in a horozontal direction (parallel to the horizon line).
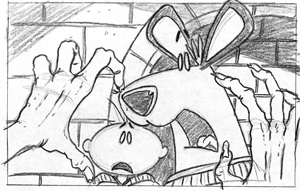
In the example shown here, the move is slight to follow the character's head movement as he turns and looks out through the bars of the cage.
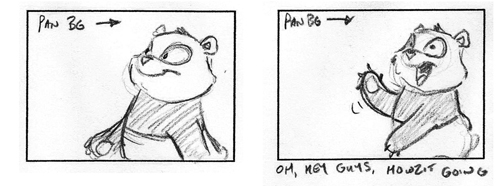
In this example, the character is walking and the camera moves along with him keeping him in the same position on screen.
It will appear as though the background is moving in behind him.
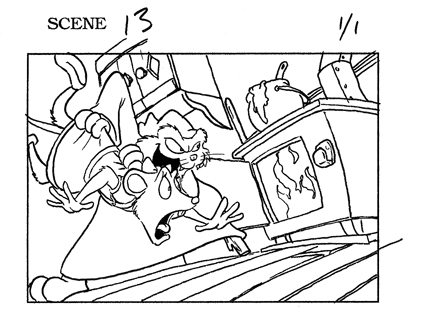
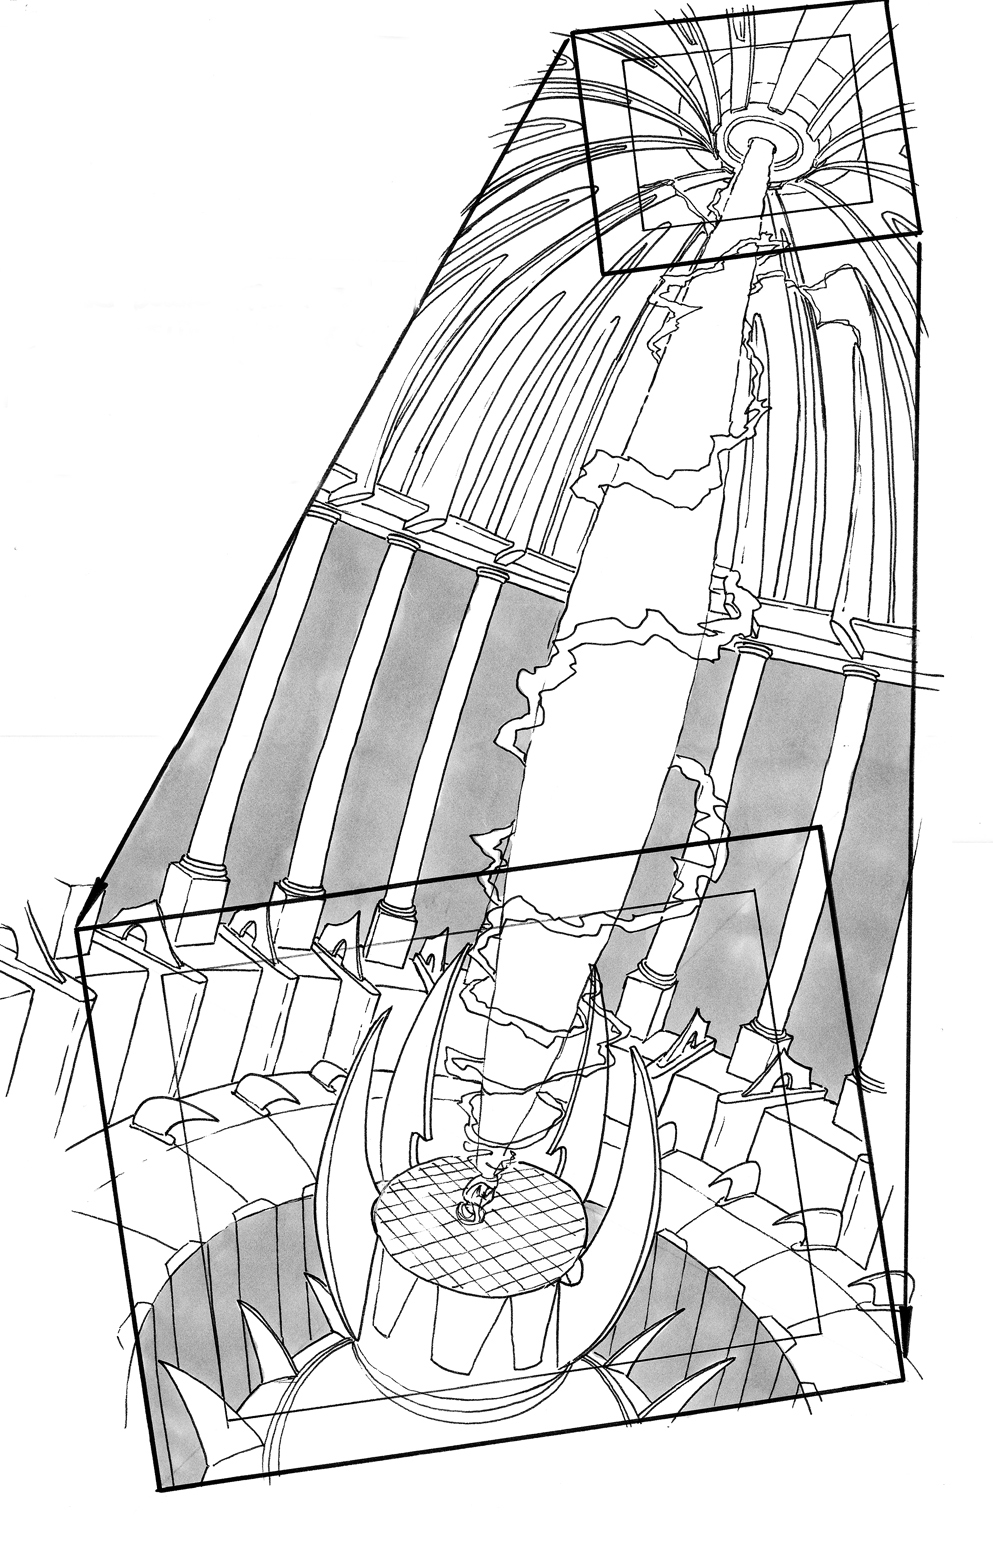
Vertical Pan
The camera moves vertically (up or down).
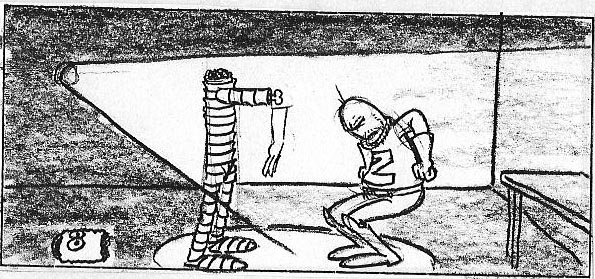
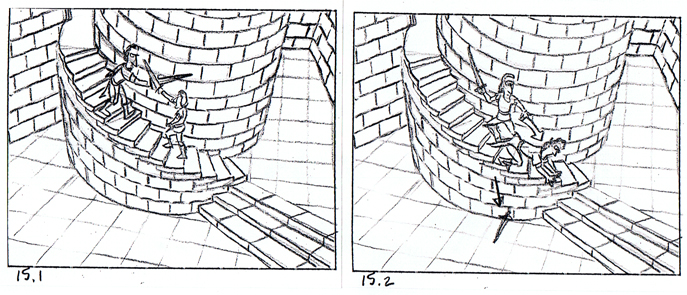
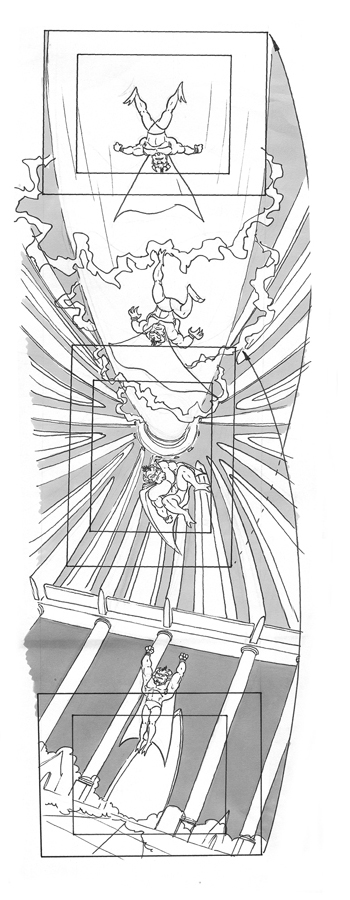
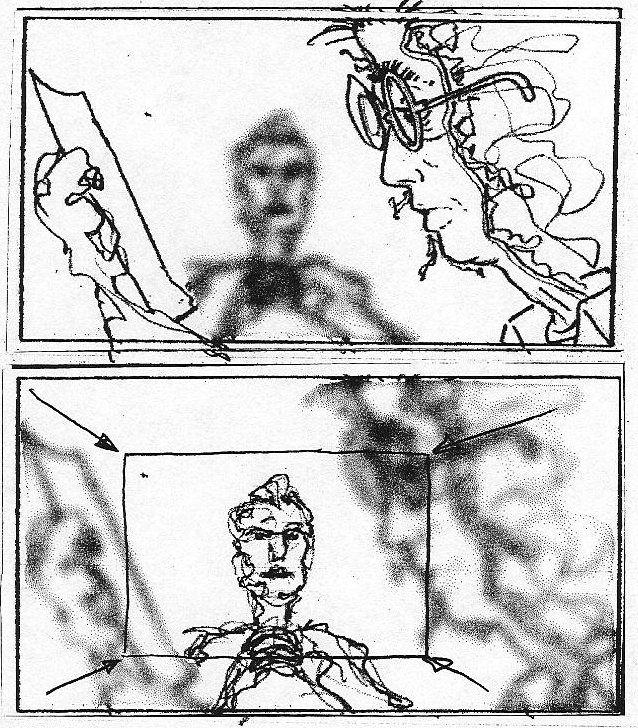
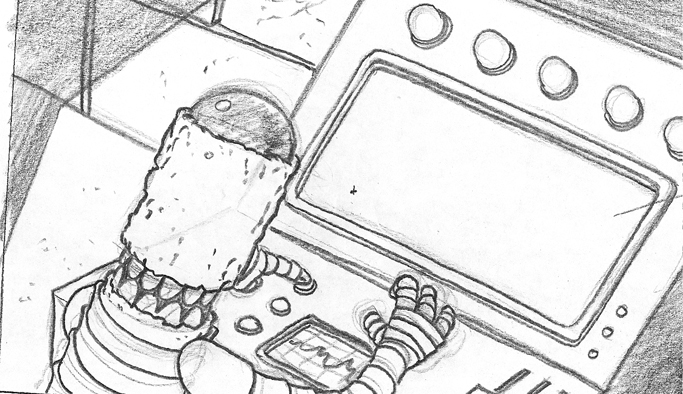
In the first example on the left, the camera begins looking up at the top of the chamber and follows the energy beam down to the platform below. This would involve not only the vertical movement of the camera but also a camera tilt and an up-shot at the beginning and ending with a down-shot. This is also known as a "pivot pan".
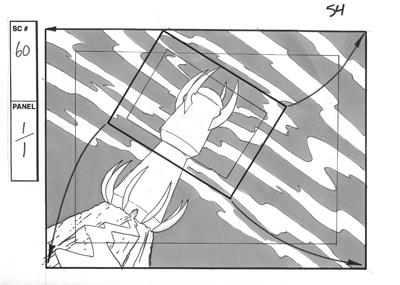
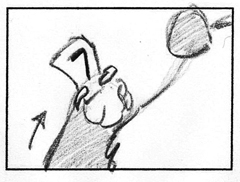
In the second example, the character begins in the bottom panel and jumps up into the air. In the middle panel, the camera rotates to follow the character as he comes down for a landing. In your mind, pretend the character is standing in front of you and you watch them as they jump up and over your head, then land behind you. How would you move your head if you were to follow them through this action?
Diagonal Pan
The camera is moving diagonally, both up or down and from one side to another.
Non-linear
The camera just follows the subject wherever they go.
Camera Movements
A camera movement is something that deals specifically with the movement or manipulation of the camera itself to create the desired visual effect.
Tracks
The term "Track" is actually an old classical animation term used to indicate a movement that is the same as a pan. On the old animation camera stands there were panning pegbars that allowed you to move up to 4 different elements at different rates. There were times when everything in the scene needed to move together and rather than moving all the pegbars and risking something moving slightly faster or slower, you'd move the entire table under the camera. This was called a track movement.
These days, there is no such thing as the "camera table" as everything is digital inside the computer, and so the term has gone the way of the dinosaur.
The term track is sometimes used in reference to, "track with the character", which means, if the character was walking, the camera would keep pace with them and keep them in field, essentially creating a panning background behind them.
Truck in (Zoom in)
"Truck in" is another older term which has basically been replaced with "Zoom in". This is where the camera appears to be moving closer to the subject on screen. With your video camera, you use the toggle switch to either zoom in or zoom out. In the old animation camera days, the camera physically moved closer to the artwork on the table creating the same visual effect.
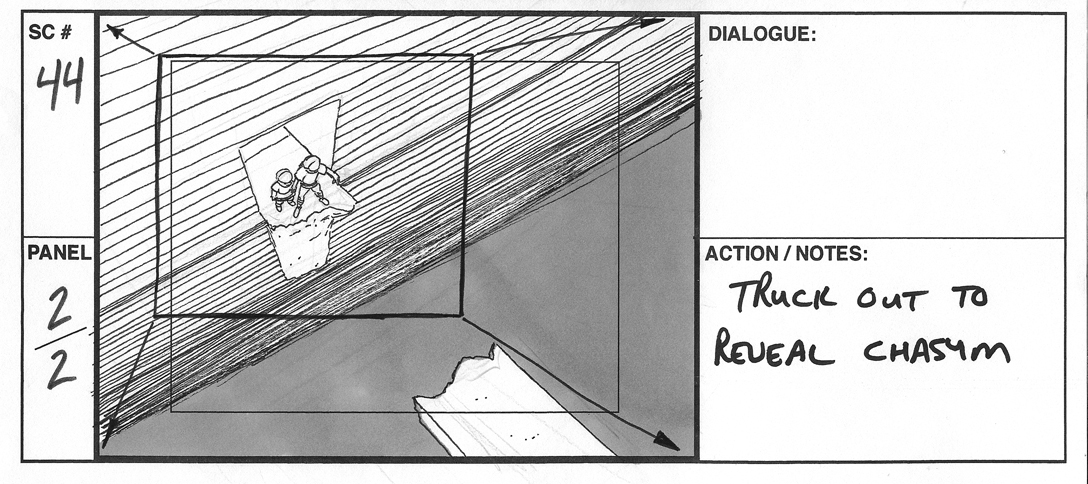
Truck out (Zoom out)
This is the opposite of the Zoom in movement, where the camera appears to be moving away from the subject on screen.
Again, these can be used in combination with any of the other types of shots. They are typically used to draw the audience's focu towards something specific in a Zoom in, or to reveal something that is hidden from the audience in a Zoom out.
Rotations
Is basically the same thing as a "Tilt" except in a rotation, youre actually moving the camera from one angle to another to make it appear as though there is a spinning or rocking movement during the scene. The movement can be very subtle as in a couple of degrees of rotation or it could be a complete 360˚ turn or more, depending on the effect you want to acheive.
Rack Focus
This is an in-camera movement where the focus is on one subject while everything else is out of focus and then the focus changes to a different subject within the same scene.
In this example the focus is on the character in the foreground at the start of the scene and then it moves to the character in the center. There is also a truck in indicated here by the smaller box and arrows to indicate the direction.
Character Shots
These deal specifically with the number of characters that are on screen at any point in time. You could start off with a one shot and then another character can enter the scene and it becomes a two shot.
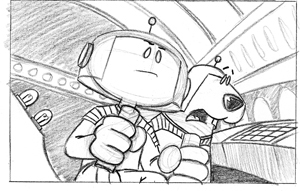
One shot
One character on screen. These can be used with any of the above shot desriptions.
Two shot

Three shot
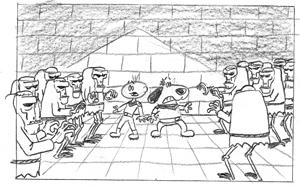
Crowd shot
Any shot that has more than three characters can be termed as a crowd shot.

Over-the-shoulder
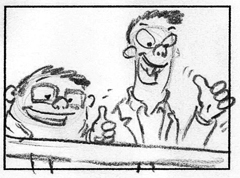
There are lots of different variations on this one. Basically, it's something really big in the foreground and something smaller that we're focussed on in the background. Usually the foreground character is so close to the camera that we only see a small portion of them and they're usually used as a framing device like in the first example below:

In the next two examples we're looking at something that the character is also looking at from the point of view of actually being positioned over the shoulder.
In this example, it's the classic gunfighter type of setup where the horizon line is lowered to the foreground character's hip.
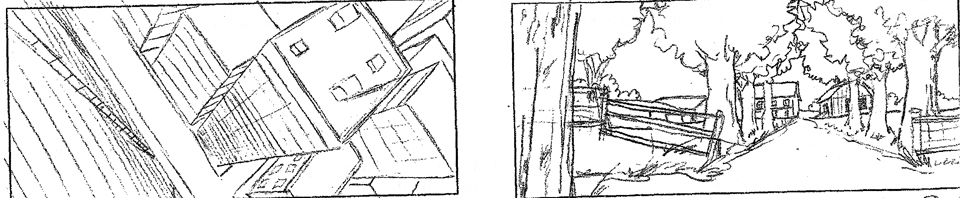
Establishing Shot
An establishing shot is usually used at the very beginning of a sequence to show the audience where the next few scenes will be taking place. It's usually a long shot that shows an environment that is stereotypically recognizable.
The first panel would be: "In the City" while the second would be: "In the country"
Point of view (Subjective)
This is a shot viewed through a character's eyes. It's what they actually see from their point of view.
Objective
The objective point of view is more of a hidden camera within the environment type-of-thing. The characters in the scenes are not aware that they are being photographed and do not look at the camera at any point in time. The objective shot tends to be a bit more impersonal and even voyeristic to a certain extent. Generally speaking, most movies are filmed from an objective point of view.
Voyeristic
Similar in tone to the objective shot, this is almost always from a high angle as though you are the "fly on the wall" looking in on something that you normally would not be able to see. It could also be from a lower angle where you're peeking out from some hiding spot, like behind a couch or under a bed or inside a closet.
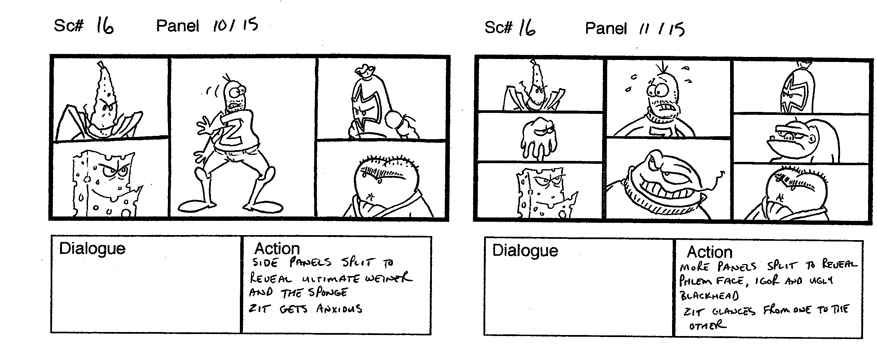
Split Screen
Where the screen is divided up into smaller segments to allow the audience to see more than one thing at a time. The example shown here has the screen subdividing several times like in the opening titles of "The Brady Bunch" television show.
Types of Scenes
Active
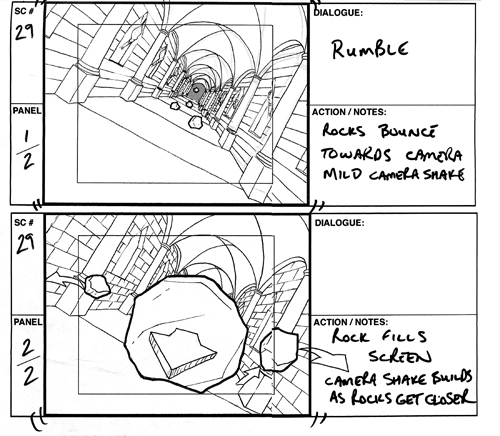
An active scene is where stuff is happening; characters are moving from one point to another or they are doing something that involves any type of physical movement.

Passive
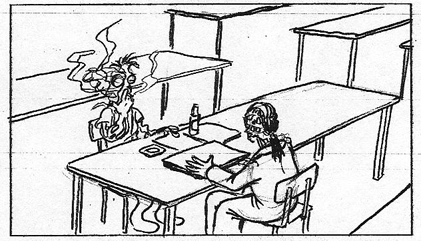
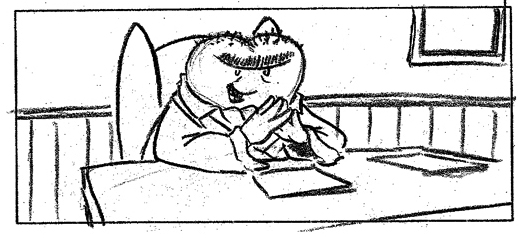
The passive scene is the exact opposite, where there is no movement on the screen and the characters are static within the field of vision. The characters might be sitting at a dinner table talking or the character is standing and delivering his lines but not moving at all.
Dialogue
This is a shot where one or more characters are talking.
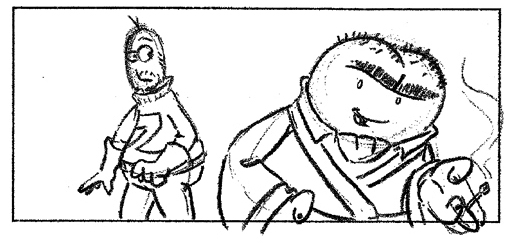
Montage
The word montage is from the French term "to assemble". A montage is a sequence of related scenes that can have large time gaps missing between each of the scenes. In this example, the character is getting dressed in his costume and transforming into the super hero, The Zit. A series of actions that might take several minutes in real time, is condensed down to just the highlight points in a matter of seconds and does not use any dialogue.


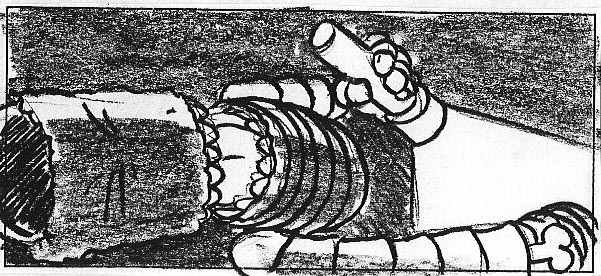
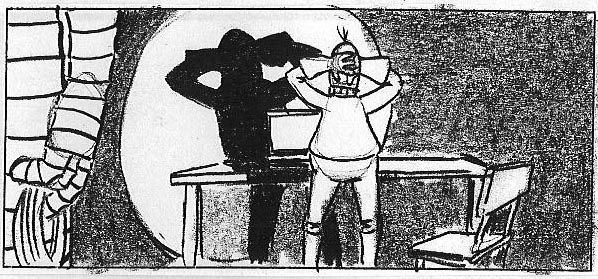
Silhouettes
Are used to make something mysterious or scary.
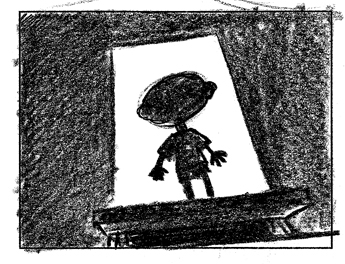
One of the most chilling uses of the silhouette is from the film "Nosferatu" where he is climbing the stairs to the girl's room... very creepy.

Transitions
A transition from one scene to the next can be instantaneous as in a "cut" where there is no time lapse at all between the end of one scene, and the beginning of the next, or it can take place over a number of frames depending on the feeling you want to convey to the audience. Here are the basic ones:
Cross Dissolve
A cross dissolve is an effect whereby one image on screen is gradually replaced by the overlapping of another image in the next scene. Technically, this is acceived by fading the first image out gradually over a number of frames. If the fade was done over 100 frames, each frame would fade by 1% until it dissappears. The next scene fades up from 0% in 1% incriments, or the opposite percentage so that both combined add up to 100%.
If the first scene fades out by 1% each frame, the first frame would be 100, then down to 99, then 98, etc. The next scene would start at 0% then move up to 1%, then 2% and so on.
A cross dissolve is usually used to indicate a short passage of time as in, "Later that day..." or a transition to another place.

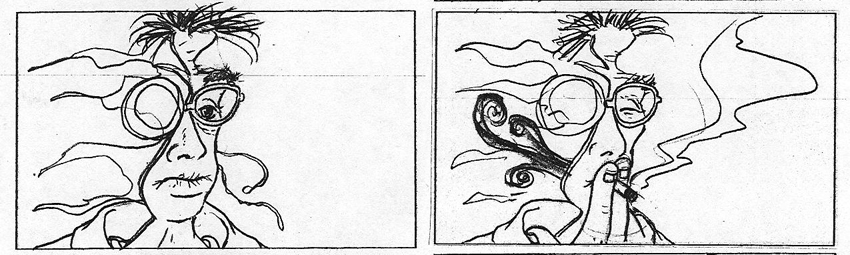
Ripple Dissolve
This is the same as the cross dissolve but there is a filter laid over the image to cause it to look distorted, in this case as thugh it is under water.
This is sometimes used to indicate a flash back or a dream sequence.

Wipe
A wipe is created by sliding the image of the second scene directly over top of the first scene. In this example the second scene is sliding down from above. A wipe can move in any direction or from any shape desired.
A wipe is typically used to transition to another location and does not infer that any time has passed, as in "Meanwhile, over here..."

Fade-to-black
Technically, this is the same as the cross dissolve except the second scene is blackness. You can also fade up from black.
Typically this is used to end a sequence or the entire film. It can also be used as a time transition... kinda like "The next day", because it's like the sun went down and then you fade up and it's the next day... or a week later, or a year later, etc.
You could use a slow fade to black to indicate someone going to sleep and then an abrupt cut to the next scene to indicate the character has been startled awake.