One Point Perspective Grids
Assignment #1 Part 3
One & Two Point Grids
For Part 3 of this assignment, on an 11" x 17" sheet of paper turned horizontally, I want you to draw a one point perspective room using a grid on each of the surfaces.
This time, place the vanishing point about 2 1/2" down from the center and 2 1/2" to the right.

Again, draw the far wall as a square surface (the height is the same length as the width), make it about 6" square. Once again, trace off the position of the square from Part 1.
Follow the same remaining steps as we did in Parts 1 and 2.

Create a 1" grid on this square. That will give you 6 squares across and 6 down.
Once again, you'll notice that mine has 6 across and 5 down, that's so you can't download my drawing and trace it off.

Radiate lines out from each of the points along the perimeter from the central vanishing point.


Move on to the walls, simply using the intersection points along the corner lines. Again, you'll find that you need to angle the lines slightly on the walls and on the floor for it to look correct.
Start with the left wall.

Then do the floor. Notice how the lines taper slightly to the left. This is to keep the squares from turning into rectangles.
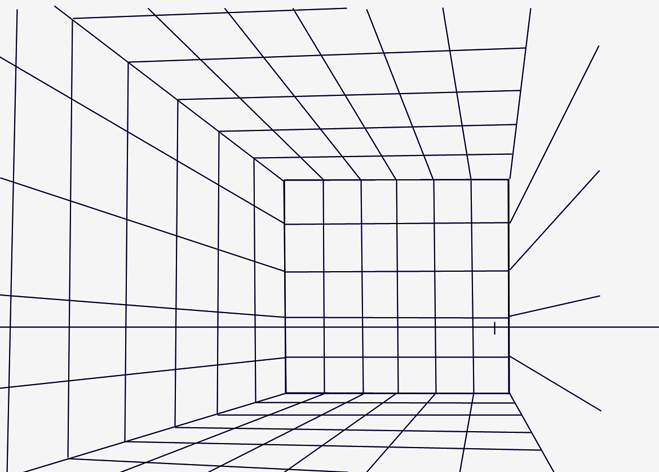
Finish the box off with the right wall. The lines are pretty tight together because the vanishing point is so close to that corner of the box.
Again, the lines have been angled in a bit more at the top.
This will now take us into the reason for using two point perspective which will be explained in the next part of the assignment.
